I thought about doing a post “My most treasured tool- my air conditioner” today, but I’m sure you’re sick of either hearing about or experiencing all this super summer weather. So today I’ll talk about my least favorite task – finishing my metalwork.
I’ll be blunt – I hate to file and sand. But these are necessary parts of the metalsmithing process. This is the #1 reason I love planishing so much – no need to sand or file if it’s planished correctly. Well, you probably still need to finish at least the edges, but I digress.
So what tools do I need to do these mindnumbing awesomely necessary tasks? Files, sandpaper, and brushes/scotchbrite.

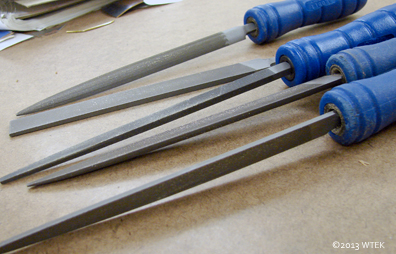
I have two basic sets of files – the big ones and the needle files. Files come in different levels of fineness (much like scotchbrite or sandpaper) but I only have the one level of fileness. I use the bigger one for the initial filing or filing of larger areas. The needle files are then used to finesse these areas, or on areas that can only be filed properly with the smaller files.
After filing (or instead of if you don’t have deep gashes, etc.) you then sand down in increasingly finer grit sandpaper. I usually use between 320 – 600. Sometimes I stop at 320 if I want a rougher finish, but if I want a gloriously smooth, soft to the touch of my cheek finish, I go all the way to 600. In extreme cases or if I want a really rough finish, I’ll start with 150 or 220 grit. I also use the super coarse sandpaper to even out rims on my bowls (provided they have a straight edge.) I also use sanding pads to get into undulating forms.

Then I need to do the final finishing touches. I like to leave a planished finish if possible. I also use scratch finishes a lot. For something slightly more matte, I use fine or super fine scotchbrite pads. I also have some coarser ones to give it a gritter, yet even finish. In the old days, we used to use steel wool rather than scotchbrite, but this is less rusty.
It is actually possible to achieve a shiny finish by polishing your metal. This is obviously not my style, but I was forced to learn it in college. For this you have to sand down to at least 600 grit and then use polish and a wheel on either your flex-shaft (for small pieces) or on an industrial size machine. You can also tumble your pieces, which is best when you do multiple piece production.


When I was learning small metal construction we were required to give every piece a mirror finish, and to sand all the way to 2500 grit before we could use a power tool. It was valuable but spirit-crushing work. Have you tried using the scotchbrite wheels that go on a grinder?
LikeLike
Wow, Kai, I don’t envy you that. I don’t have a grinder at home, though in school I did use a scratchbrush that was mounted like that with a soapy water stream. I do miss that…
LikeLike
“Soft to the touch of my cheek” – that’s such a great way to put it! In training, I learned that finishing takes up a lot of time, much more than you would think first. I work only on small pieces and only have a flex-shaft, and I know that already there you have to be both careful and patient, so I have all respect for finishing work on big pieces! Good luck with staying as cool as you can!
LikeLike